The Auto Reply feature instantly responds to incoming messages with pre-configured responses, ensuring timely acknowledgment and managing customer expectations, thus improving communication efficiency
Here’s how:
- Click on the Settings icon from the left navigation menu
- Then select the Auto Reply menu (see the screenshot below)
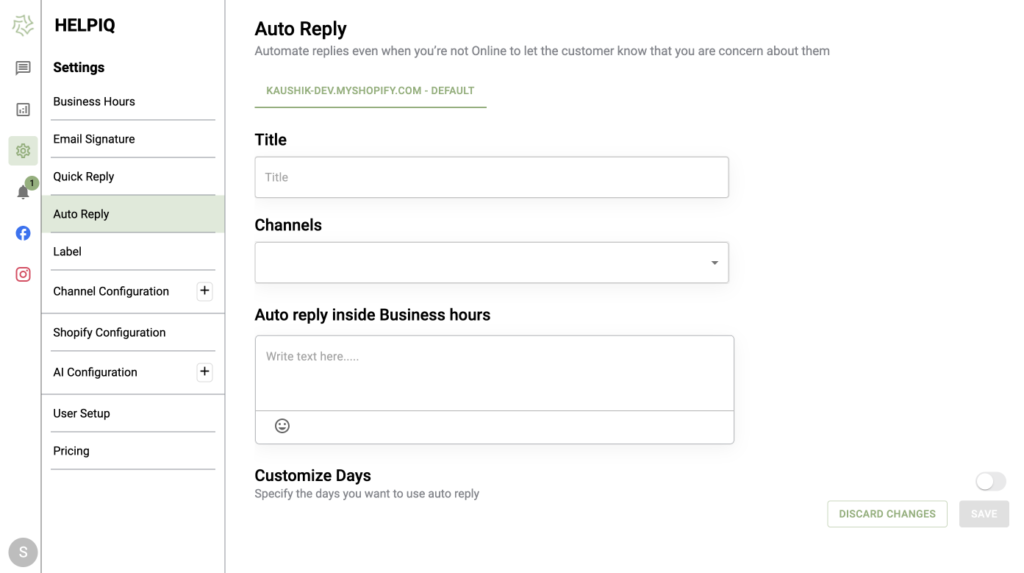
On the right-hand side, you will see the dashboard.
3. Give the title to the auto-reply
4. Select between different sets of channels on which you want to send auto-reply to the messages.
5. Enter the text in the auto-reply inside the business hours section that you’d like to send to the user
💡 You can also specify the days you want to use auto-reply by toggling on Customize days
6. Now Click on the Save button.
Auto-reply is now saved